How do custom packaging decisions—such as box structure, flute profile, print method, and dimensional clearance—impact the total landed cost of branded merchandise and onboarding kits?
The quote comes back $3 higher per unit than the sample run, and nobody on the email thread wants to be the one who explains why. When you are managing multi-item programs like corporate onboarding welcome kits or seasonal gift drops, packaging is usually treated as a final aesthetic polish. In reality, packaging specs drive total program costs more than almost any other variable—shaping not just the price of the box itself, but freight rates, warehouse storage fees, and transit damage risks.
When buying teams face unexpected cost overruns on custom merchandise drops, the issue is rarely the cost of the t-shirts, pens, or tumblers inside the box. It is almost always a mismatch between the box structure, the printing process, and carrier shipping rules. Understanding how packaging options compare across real-world operational criteria allows you to protect your program budget without sacrificing the recipient's unboxing experience.
The Core Framework: Standard Corrugated vs. Premium Rigid Packaging
To evaluate how packaging alters your final invoice, you must compare the two primary structural formats used for custom kits: Standardized Corrugated Mailers and Custom Rigid Boxes.
The real driver behind packaging cost differential is structural material weight and how the empty boxes travel to your fulfillment point. A custom 2mm rigid box arrives at your office or warehouse pre-assembled, meaning you are paying to ship and store empty air long before a single branded item is placed inside. Conversely, corrugated mailers ship completely flat, occupying a fraction of the pallet space and dramatically reducing inbound freight costs.
Consider a practical comparison for a company onboarding a large new-hire cohort in the same month—for instance, shipping 200 welcome kits containing a hoodie, insulated tumbler, notebook, and pen set:
Scenario A (Custom Rigid Box) delivers a luxurious executive unboxing experience with thick paperboard walls and magnetic closures. However, the empty boxes require four full warehouse pallets for storage, cost $8.50 per box to manufacture, and trigger carrier dimensional weight surcharges due to their outer bulk. Total landed packaging and freight cost per kit: $14.20.
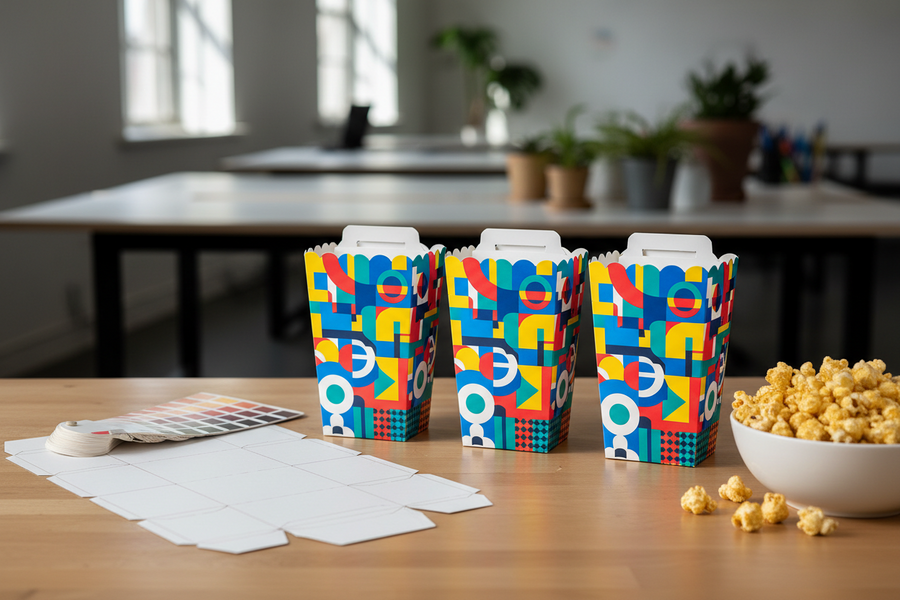
Scenario B (Corrugated E-Flute / B-Flute Mailer) uses a sleek roll-end tuck-top mailer printed with vibrant graphics inside and out. The flat-packed boxes fit on a single pallet, cost $3.20 per box at 200 units, and slip into standard parcel freight size brackets. Total landed packaging and freight cost per kit: $5.70.
What actually determines whether a packaging spec scales smoothly comes down to how well the box structure handles handling real-world freight stress while keeping outer dimensions as tight as possible. For 90% of corporate programs, Scenario B represents the clear operational winner.
Flute Selection Mechanics: E-Flute vs. B-Flute Performance
Once you choose a corrugated mailer structure, the next decision is selecting the correct corrugated flute profile. The flute refers to the wavy arch layer sandwiched between the inner and outer linerboards of the box.
The difference between E-flute and B-flute comes down to balancing graphic print clarity against structural crush resistance under load. Choosing the wrong profile leads directly to damaged goods or unnecessary packaging expenses:
- E-Flute Corrugated (1.5mm thickness): Engineered with tight flute spacing (roughly 90 flutes per linear foot), creating an extraordinarily smooth surface. It is ideal for vibrant, high-resolution graphic printing. However, E-flute offers lower vertical crush strength. It is best suited for lightweight kits weighing under 500g—such as apparel-only drops or stationery sets.
- B-Flute Corrugated (3.0mm thickness): Features wider arch spacing that absorbs significantly higher top-to-bottom compression loads. B-flute meets TAPPI T 811 edge crush testing (ECT) standards required for shipping heavier, dense items like ceramic mugs, stainless steel tumblers, and heavy fleece jackets.
A pattern that shows up again and again: teams that select thin E-flute to get super-crisp print details on a heavy 1.5kg kit often find the box walls bowing outward during shipping. To compensate, fulfillment teams end up wrapping the custom box in an extra outer poly mailer bag or bubble sleeve—adding $1.20 in materials and labor per unit and spoiling the clean exterior look you paid for in the first place.
Print Economics: Digital vs. CMYK Offset Setup Thresholds
How your artwork is transferred onto the box material creates another major price split on your quotation. Two main technologies dominate custom box production: Digital Printing and CMYK Offset Printing.
What actually dictates print cost efficiency is the total production run quantity and how setup costs are amortized across the order:
Digital printing functions like an industrial inkjet printer, applying ink directly to the board without physical plates. It carries zero setup fees, making it the most economical choice for small pilot batches of 50 to 300 units. However, the per-unit run cost remains completely flat whether you print 50 boxes or 500 boxes.
CMYK Offset Lithography prints artwork onto a high-gloss paper sheet that is then laminated onto the corrugated board. Offset printing requires physical printing plates and machine calibration, resulting in upfront tooling and setup fees ranging from $150 to $300 per job. However, once those fixed costs are paid, the per-unit print cost drops precipitously.
- Audit total kit weight to select between 1.5mm E-flute (<500g) and 3.0mm B-flute (>500g)
- Add a mandatory 5mm clearance margin to all internal box dimensions to accommodate inserts
- Calculate carrier Dimensional Weight (Length × Width × Height / 139) to avoid freight jumps
- Shift from Digital to CMYK Offset printing when total box volume exceeds 500 units
- Verify that empty box storage space matches your team's physical receiving capacity
One thing we notice surprisingly often is that buyers compare quotations before they compare production systems. If you are ordering 600 welcome kits for an annual onboarding program, choosing offset printing allows you to absorb the $200 setup fee while dropping your per-box cost from $5.50 down to $3.10—saving $1,240 on the total job.
The Invisible Budget Killer: Dimensional Weight (DIM) Penalties
Even if you secure a great unit price on the physical box, logistics carriers can double your landed shipping costs if your box dimensions cross volumetric thresholds. Modern shipping carriers calculate freight charges using whichever number is higher: the Actual Weight of the package or its Dimensional Weight (DIM).
Dimensional weight is calculated using the standard industry formula:
DIM Weight (lbs) = (Length × Width × Height in inches) / 139
If you design a spacious, oversized custom box (e.g., 14" × 12" × 6") to make your kit look impressive, its dimensional weight calculates to 7.25 lbs. Even if the items inside—a t-shirt, notebook, and pen—only weigh 2.0 lbs in reality, the carrier will bill you for an 8.0 lb package. Across 200 shipments, that dimensional gap can add $300 to $600 in unexpected parcel freight surcharges.
To keep shipping costs tight, follow the 5mm Clearance Rule: measure your kit items when laid out in their custom paperboard or foam insert, and add exactly 5mm of clearance space to the internal box length, width, and depth. This 5mm buffer accounts for insert material thickness and production tolerances without creating excess outer volume that triggers carrier DIM penalties.
When You Should NOT Choose the Standard Recommendation
While standard corrugated mailers offer the best balance of cost, protection, and sustainability for general employee onboarding and customer gifts, there is one clear exception where you should choose a luxury rigid box instead.
If your program focuses on executive onboarding, C-suite retention, or ultra-premium partner gifting where the unboxing experience is the primary goal of the initiative, the rigid box remains worth the premium. When a single hire's executive compensation package is substantial, spending $20 to $30 on a rigid keepsake box with custom foil stamping and magnetic closures is a tiny rounding error relative to the strategic value of the interaction.
In those specific scenarios, accept the higher unit cost, the non-foldable storage footprint, and the dimensional shipping surcharges as intentional investments. For everything else—from monthly new-hire welcome kits to department gear drops—sticking to optimized, well-engineered corrugated mailers protects your capital while delivering a clean, professional result.
What Buyers Usually Ask Next
What is the most cost-effective way to secure items inside a custom box?
Die-cut corrugated or paperboard inserts are significantly more cost-effective and eco-friendly than custom EVA foam inserts. Paperboard inserts ship flat, reduce tooling costs by 40% to 60% compared to foam molds, and can be fully recycled alongside the outer box.
Can I print on the inside of a custom corrugated box without doubling the price?
Printing on both the inside and outside of a box does not double the cost, but it typically adds 20% to 35% to the base unit price. This is because the corrugated sheet must pass through the printing press twice or use a specialized double-sided printing setup.
How far in advance should I order custom packaging for an onboarding program?
Standard custom corrugated mailers typically require 2 to 3 weeks for production after artwork approval, plus 3 to 5 days for ground transit. For initial custom orders, build in an additional 7 to 10 days for pre-production physical sampling and fit testing before approving full production.